Getting Started With The Forum Software v1 - OUTDATED

Status
Not open for further replies.

Grand Potentate

Supporter of Possible Sexual Deviants
Messages
39,196
Since most of you are unfamiliar with the Xenforo forum software I thought I'd make a few primers to show you where features and settings are located, and how they work.

Lets start with what you see when you land on the main forum page. This is the forum home page:
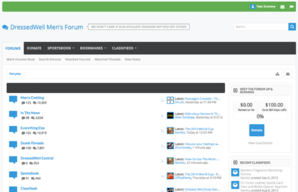
Forum Home.png

At the very top right you've got your User Name, which links to your user profile and settings, Private Messages (which is the mail icon), and Alerts (which is the flag icon). I've highlighted them here:
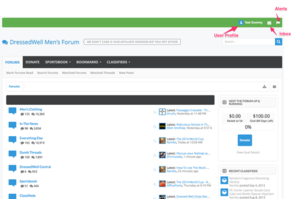
Forum Home 2.png

Below that, you have the Navigation Bar and the Search Box:

Forum Home 3.png

In the Navigation sub-bar, you can Mark Forums Read, Search Forums, see your Watched Forums, see your Watched Threads, and see all New Posts.

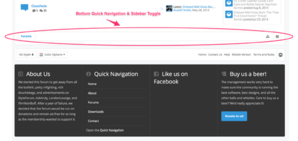
Below those, you the Quick Navigation Bar and the Sidebar Toggle:

Forum Home 4.png

Below the Quick Navigation bar, you have Forum List, Latest Post, Forum RSS Subscribe button, and the Sidebar:

Forum Home 7.png

Below the Forum List, you have another Quick Navigation Bar, another Sidebar Toggle:

Forum Home 6.png


The subsequent posts will go into detail of all the features.
 

Attachments

  • Forum Home 5.png
    Forum Home 5.png
    65.8 KB · Views: 58
Last edited:
Forum View:

Once clicking on a forum from the Main Page, you arrive at the Forum Thread View page:

Forum View 1.png

From here, you can Watch The Forum, and enter into a thread a few different ways. If you click on the thread title itself, it will take you to the first post in the thread the first time you've read it, and the last post automatically once you've read it. You can also go to the first unread post by clicking on the blue dot to the left of the thread title. You can also go to the latest post in the thread by clicking on the time stamp underneath the latest post on the right hand side:

Forum View 2.png

You can also see which threads are Sticky threads (shaded with color and have a little pin icon) and Locked (have lock icon).

You can also sort the forum list view by Total Replies, Views, & Last Message in either ascending or descending order by clicking on those column heading themselves.

Forum View 3.png

You can also sort the Thread Display options at the bottom of the page:

Forum View 4.png

Forum View 5.png

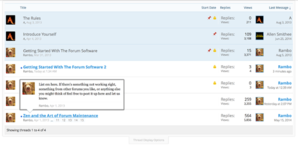
A neat feature is that you can hover your mouse/cursor over the thread title itself and it will popup a preview of the first post and show if the thread has more than one page, which you can then click on to jump to:

Forum View 6.png
 
Last edited:
Inside The Thread

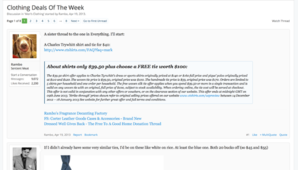
Once you click on a thread, you're brought to the thread view:

Post View.png

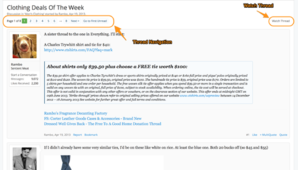
The thread page navigation is at the top, along with another link to go to the first unread. You can also Watch The Thread (which sends you an alert if someone replies to it).

Thread View 1.png


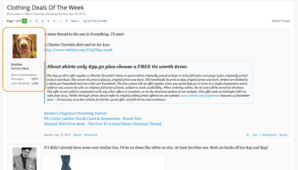
The Member Profile Card (with the avatar) is next to each post. You can click on the Avatar or the User Name to get the Member Card to popup:

Post View 2.png

Post View 3.png

From the Member Card you can go to the member's Profile Page, Start A Conversation, Follow them, or Ignore them. You can also see their post count, join date, likes received, number of open Classifieds, Sportsbook cash, and their Custom Title.

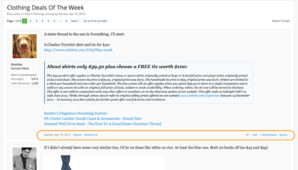
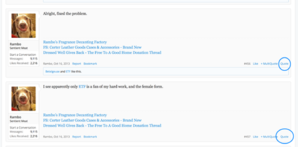
In the post itself, you can see the date of posting, Report the post, Bookmark the post, link directly to the post, Like the post, add the post to MultiQuote, and Quote the post:

Post View 4.png

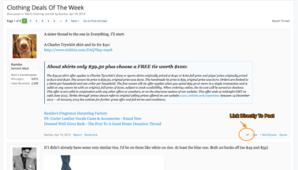
To link directly to the post itself, click on the post # to the left of the Like button:

Post View 5.png

Which will bring up a popup window giving you options for the link:

Post View 6.png
 
Replying To Threads - Using The Editor:

When you're ready to reply to a thread, scroll down and find the reply window with the Editor:

New Editor 1.png

The buttons going across the Editor are as follows:

New Editor Button Labels 11-12-14.png

And here's the Smiley editor showing the Smiley Categories and how you can scroll the smilies to see more of them:

New Editor Smileys.png

Clicking the Memes or Smilies button will show the respective smilies in the categories.
 
Last edited:
Using The Editor - Saving Post Drafts:

The Drafts feature is very handy if you're typing out long replies or using multiple quotes. The Draft button is in the editor toolbar and looks like a floppy disk. Eventually, once you type for 30 seconds, the system will automatically save a draft for you:

Drafts 1.png

Or, you can just press the Drafts Button and manually save a draft copy of your post yourself:

Drafts 2.png
The system will then mark a place in the database, within that thread, with your saved text in the editor. So, for instance, if you're typing a long reply to a thread and your browser crashes, when you go back into that thread the text will already be there waiting for you:

Drafts 3.png

See the grayed out text? That's your saved text from the previous session.

Note - you do not have access to your drafts. They work on a per-thread basis. Essentially, its a browser crash recovery system.
 
Using The Editor - Uploading & Linking Images:

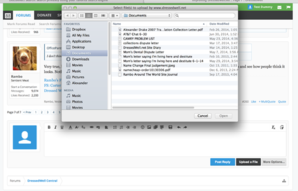
Linking to images and media is very simple in the Editor. Lets start with uploading your own media and files. In the reply box, click on Upload A File, which brings up the file selection window:

Media 1.png Media 2.png

Once you select your file, the system will upload it to the server and you will have the option to insert it into the post as a Thumbnail or a Full Image, or Delete it entirely:

Media 3.png

If you're uploading more than 1 image, the system will give you the option to insert all the images as thumbnails or full images. You can still individually select each image type still:

Media 4.png

Note: When inserting the image or file, the system will insert it at the current location of the cursor. There are also limits on the size of the images you can upload and the amount of images you can upload per post. If you attempt to upload a file or image that is too large (dimensions or file size), the system will give you an error message:

Media - Upload Error.png

To link to external images, use the IMG button, which brings up the box where you add your image link:

Media 5.png

Media 6.png
 
Last edited:
Using The Editor - Linking To Media:

You can also link to media and special media types using the Insert Media button:

Media 7.png

This will bring up the link to window, with a list of the media sites that can be linked from:

Media 9.png

The full list is:
  • 8tracks
  • ABC News
  • Amazon Product
  • Audiomack
  • Bandcamp
  • BBC News
  • CBS News Video
  • CNBC
  • CNN
  • CNN Money
  • Colbert Nation
  • CollegeHumor
  • Coub
  • Comedy Central
  • Dailymotion
  • eBay
  • ESPN
  • Facebook
  • Fox News
  • Funny or Die
  • Getty Images
  • Gfycat
  • Grooveshark
  • Hulu
  • imgur albums
  • IMDB
  • Instagram
  • LiveLeak
  • Mixcloud
  • MSNBC
  • National Geographic
  • Rdio
  • SoundCloud
  • Spotify
  • Team Coco
  • TED Talks
  • The Atlantic Video
  • The Daily Show with Jon Stewart
  • The New York Times Video
  • The Onion
  • The Wall Street Journal Online
  • TinyPic Videos
  • Twitter (via custom iframe)
  • VEVO
  • Vimeo
  • Vine
  • WorldStarHipHop
  • YouTube

This list is current as of 9-23-14: Included BBC News and National Geographic.
 
Last edited:
Using The Editor - Quoting People, Inserting Quotes, & Spoilers

The system has a great built in feature that auto-links all quoted images, and auto-collapses all quoted text that's over a certain height, so something like StyleForum's WAYRN will never happen.

To quote someone, just hit the Quote button, highlighted below:

Quote 1.png

The quotes will automatically be applied to the reply box. If you want to quote more than one person, you could just keep hitting the quote button for each post. You could also quote the same post multiple times this way if you didn't want to copy and paste the original quote. Note: This method of multi-quoting does not work if the quotes are not on the same page. You need the multi-quote system for that.

Quote 2.png

If you want to reply to the specific quote, you need to make sure to type your reply outside of the [/QUOTE] box, otherwise it will be included inside the quote. Here's an example:

Quote 4.png

Quote 3.png

When quoting Images, the system will automatically produce the images as links. Here's how that looks:

Quote 5.png

The link inside the quote is clickable and will take you to the image. The image above is hosted on the server, and that's why its listed as an attachment. It was uploaded using the Upload A File button. If an image is externally hosted, uploaded using the IMG or Media buttons, it will show up with the web address. Like this:

Quote 6.png

When quoting large blocks of text, the system will automatically collapse the quote into a block that fits into the reply window, but is expandable when clicked on. Here's a good example of a long post:

http://www.dressedwell.net/forum/threads/inequality-oligarchy.786/#post-44765

When I quote that post and reply to it, this is how the reply will look:

Quote 7.png

And when you click the box to expand it, you'll be able to read the whole text.

Now, to Quote something yourself, select the Quote from the Editor dropdown menu and it will produce you at Quote code:

New Quote Button 1.png

Just make sure to type BETWEEN the QUOTE and the /QUOTE.

-To use the Spoiler feature, just select the Spoiler button from the Editor and it will generate a Spoiler code.

New Spoiler Button 1.png

But this is a bit different - with the Spoiler, you can label the Spoiler button itself with whatever you like. Here's how it looks when you hit the Spoiler button:

Quote 10.png

Once you type in whatever you would like to label your spoiler, the system will generate the Spoiler code with the label already inside it. In this example, I have labeled the Spoiler NSFW for Not Safe For Work:

Quote 11.png

Then you add in whatever link/text you like between the SPOILER and[/SPOILER. In this case, I have added text and an image using the IMG button. So here's how it looks when the Spoiler button is not selected (normally):

Quote 12.png

And here it is exposed:

Quote 13.png

The Spoiler will hide as many links/images/text quotes that you would like to keep from either revealing, or from prying eyes.

Note: You do not have to label the Spoiler. If you just leave it blank, it will simply say 'Spoiler:' on the button.

That ends our Quoting and Spoiler tutorial.
 
Last edited:
Using the Multi-Quote & Partial Quote System:

When you want to add more than one quote to a reply and don't want to scroll up and down the page repeatedly hitting the quote button, or the posts you to quote span across more than one page, you can use the Multi-Quote feature to accomplish this. Its extremely easy to do. Within each post on the bottom right is a +Multi-Quote button located between the Like and the Quote button, as shown here:

Multi-Quote 1.png

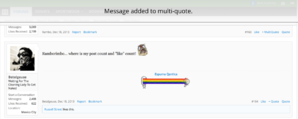
When you click that, the system informs you that the post has been added to the Multi-Quote queue:

Multi-Quote 2.png

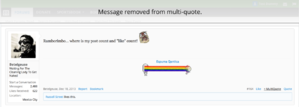
For each post you want to quote, simply click the +MultiQuote button to add it to the queue. You'll notice in the quote that I just added to Multi-Quote, that the button has changed. Its no longer +MultiQuote but is now instead -Quote. That's because you can add and remove quotes how you see fit, and in whatever order you like. When you hit the -Quote button, you're notified that the post has been removed from Multi-Quote:

Multi-Quote 3.png

So, once you've gotten your quotes together and are ready to reply to the thread, simply scroll down to the Quick Reply box and you'll notice the Insert Quotes button, highlighted here:

Multi-Quote 4.png

Click that, and it brings up the Multi-Quote review menu:

Multi-Quote 5.png

Here, you can rearrange the order of the quotes as you see fit, by dragging and them up and down the list. Here I've rearranged the order:

Multi-Quote 6.png

You can also remove quotes from this box by hitting the Remove button to the right of each quote, highlighted here:

Multi-Quote 7.png

Then, hit Quote These Messages, and they will be applied to the Quick Reply box:

Multi-Quote 8.png

And there you have it.

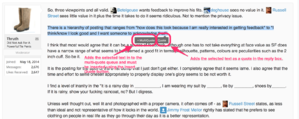
Now, to use the Inline Partial Quoting, you basically do the same thing, except this time its with highlighted text. So highlight a portion of a reply you'd like to quote and you'll get a split popup menu Multi-Quote / Reply. Selecting Multi-Quote adds it into the Multi-Quote queue, so you can quote entire posts along with snippets of posts now. The Reply allows you to choose the snippet and get it quoted in your reply. Here's how they look:

New Multiquote 1.png

So if I wanted to comment on sections of this long ass post made by thruth, I could highlight several parts and add them into the Multiquote queue. Then, when I get ready to reply and hit Insert Quotes, this is how it would look:

New Multiquote 2.png

New Multiquote 3.png

Of course, just like with full posts, you can arrange the snippets in whatever order you like after you open the Insert Quotes box.
 
Last edited:
Using Profile Posts:

So, an underused feature of the forum software is the ability to maintain a profile and have discussions within. Much like a facebook feed, but without all the stupid baby pictures and conspiracy theories that your friends would normally posts. With the most recent forum software upgrade, these become much more interactive. Your profile is found under your user name at the top of the page. Just click on Your Profile Page:

New Profile Posts 8.png

Much like a Twitter feed, you can enter in 140 characters to update your status. You can also comment and like other people's statuses from their pages as well:

New Profile Posts 9.png

Previously, the only way you could access the profile page was to click on each and every user's name. Now, we have access to that right on the forum home page. You'll notice on the left side there is now a widget showing a Profile Post Feed:

New Profile Posts.png

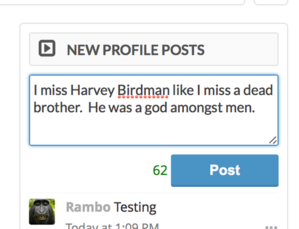
Right from the forum home you can update your status via typing directly into the widget, into the box that has the greyed out text "Update Your Status":

New Profile Posts 5.png

As you can see here, user TestDummy has added his appreciated for the dearly departed Harvey Birdman (may he rest peacefully at the bottom of the ocean with his concrete boots on). Once he hits post, it automatically updates both the widget feed and his profile:

New Profile Posts 6.png

You can also interact with other posters right from the forum home page. Just mouse over the three little dots to the right of the date stamp and you'll see the Interact menu popup:

New Profile Posts 2.png

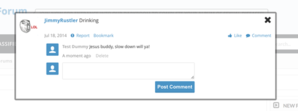
Clicking that will bring up an overlay containing the profile post:

New Profile Posts 3.png

From there, you can comment, like, report, etc.. You'll see that TestDummy has concerns for our dear JimmyRustler:

New Profile Posts 4.png

Once entered, it updates the profile thread automatically.

You can also now check in on an updated Profile news stream, just like you would posts, by going to New Posts and clicking on the New Profile Posts tab:

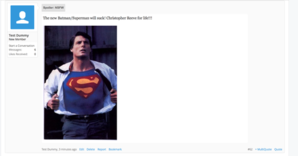
New Profile Posts 7.png

As you can see, you can also now directly comment from within this page as well.

Thus ends the tutorial.
 
Thread Tagging tutorial:

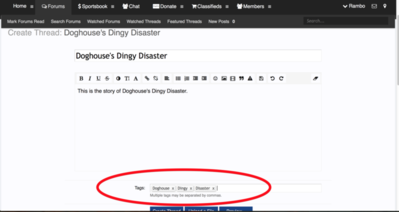
This one is fairly straightforward. When you go to create a thread, the box to add in tags is directly below the text field box:

Thread Tagging 1.png

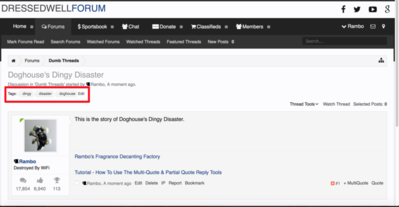
Once you create the thread, you'll see the tags directly below the thread title at the top of the page:

Thread Tagging 2.png

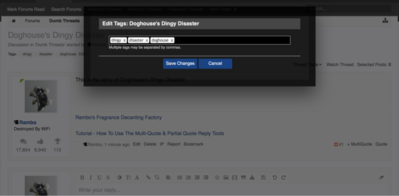
If you decide you want to change one of your tags, or add some in, just click the edit button and this will popup allowing you to edit your selections:

Thread Tagging 3.png

To search for tags, you need to use the advanced search. Bring up the regular search box and click on the More button:

Thread Tagging 4.png

Once in the advance search field, click on the Search Tags box:

Thread Tagging 5.png

This will bring up the tag search box, along with a tag cloud showing popular tags.

Thread Tagging 6.png

The tags in the tag cloud are links, which will bring you to a page showing results for all threads containing those tags, just like you did a search for them. Here's how it looks when I clicked on Doghouse:

Thread Tagging 7.png

This ends the tutorial on Thread Tagging.
 
For updated reference, these are all the types of media you can currently embed through the media button:

Embed Media Types.png
 
Status
Not open for further replies.

Users who are viewing this thread

Back
Top Bottom